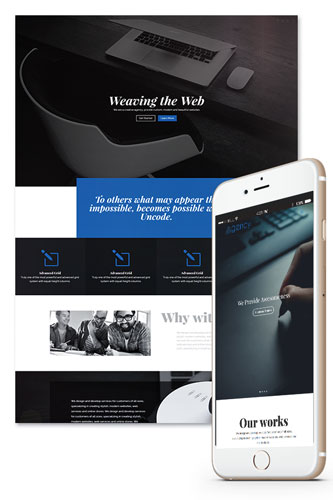
Agency Child theme has been released from BestDiviChild.com.
It has some new features, some new layouts, and a few pre-made website designs.
To see the full list of features and demo layout visit “Agency”.
Before installing “Agency” Divi child theme on the WordPress website, please ensure that “Divi” theme has been uploaded to the website’s theme folder. Then download the latest version of “Agency” DIVI child theme from elegantmarketplace.com
Okay, so when you have the “Agency” child theme downloaded then with just a few simple and easy steps we can install the “Agency” child theme as like the demo.
Those are….
- Extract downloaded main zip file
- Upload child theme
- Import layouts
- Import demo posts & projects content
- Create Page
- Create the Menu and
- Finally, review the site!
Extract Zip File: First, of all let’s extract the downloaded zip file.
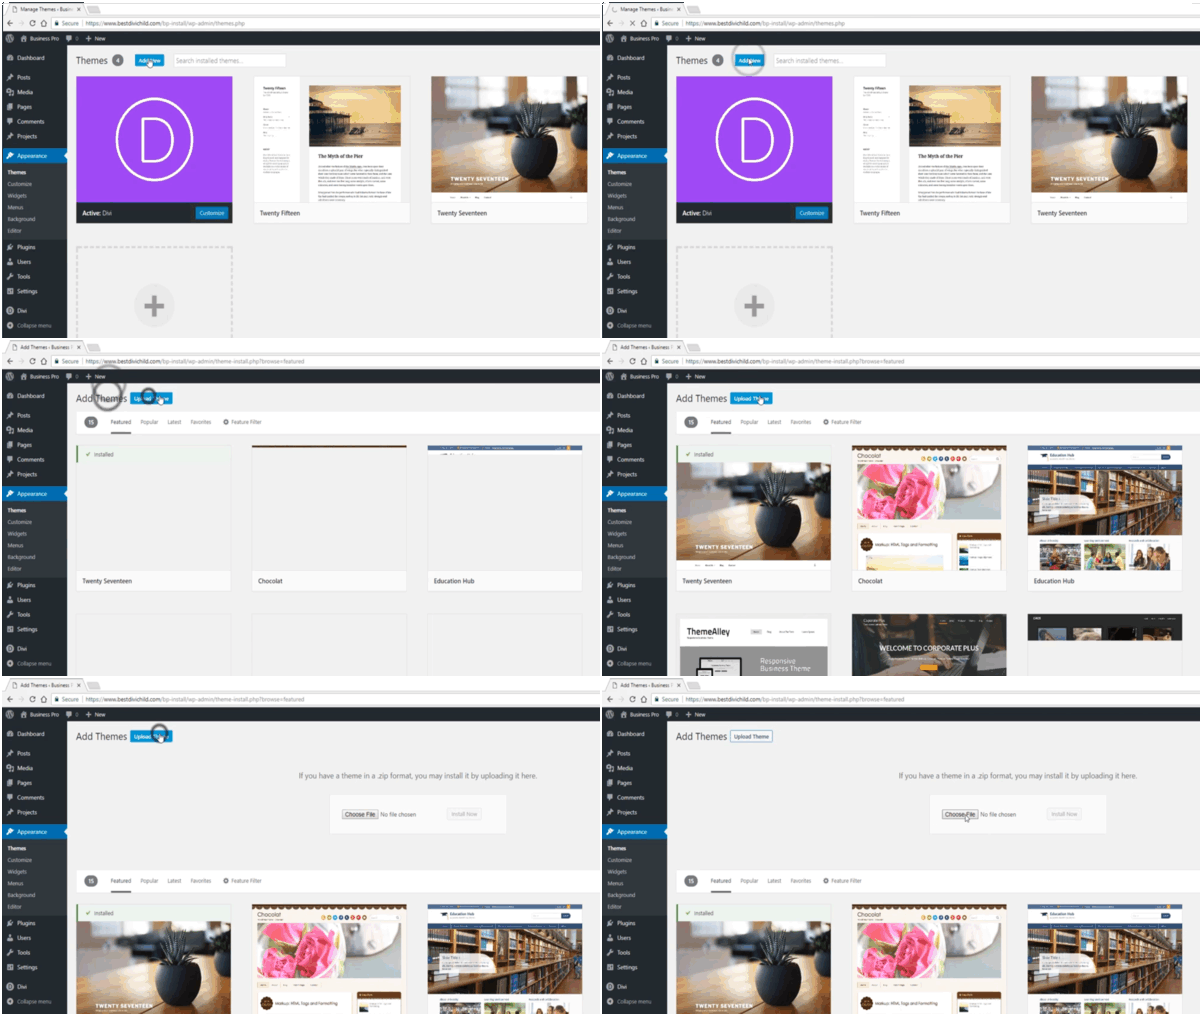
Uploading Child Theme: Within the child theme folder, there is a main child theme file called “business-pro.zip”. To upload the child theme we just need to go to “Appearance > Themes” and then click “Add New” > “Upload Theme”

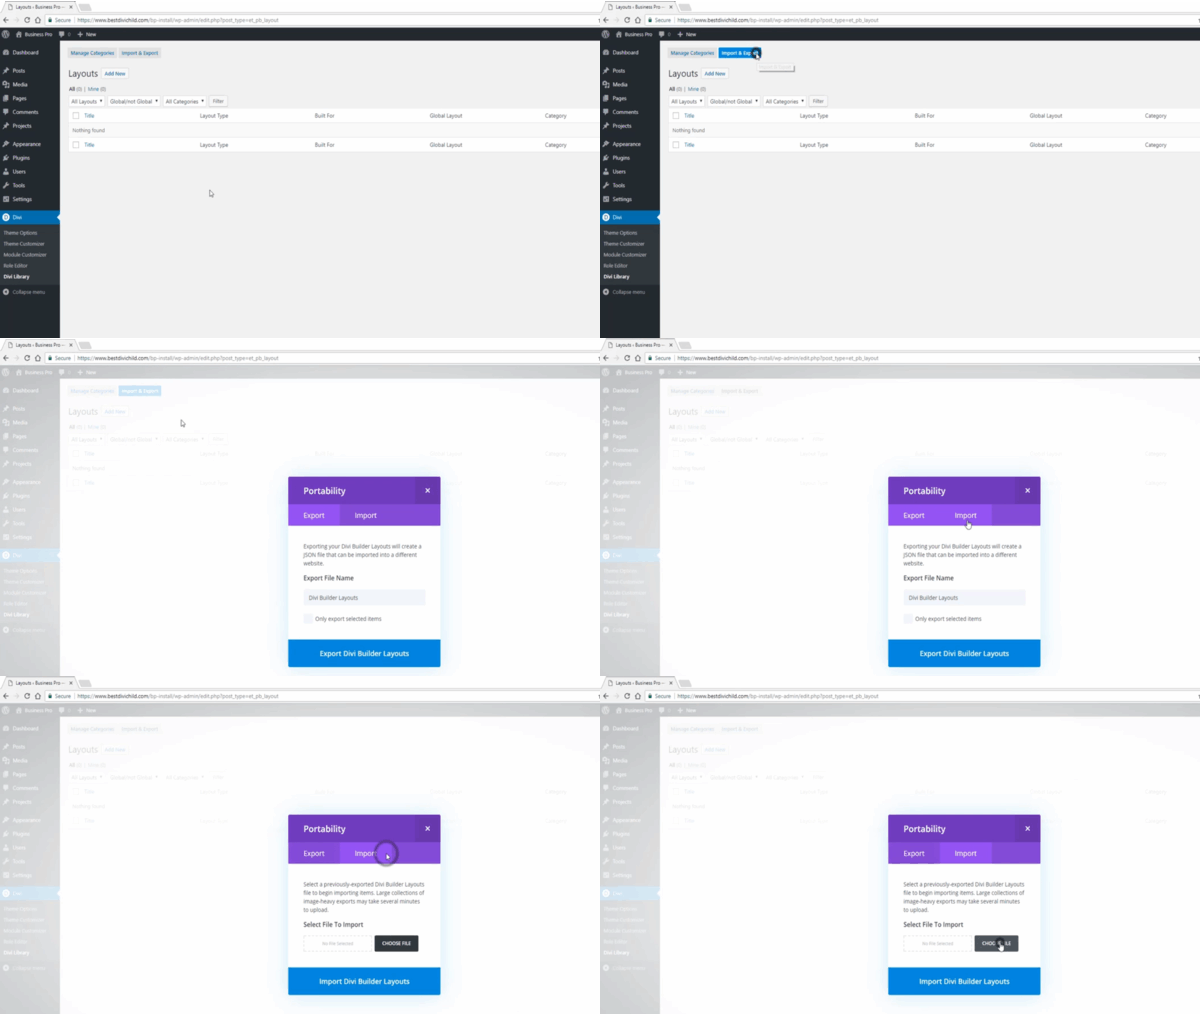
Import Layouts: At step three we should import the layouts came with the theme.
And for that, we need to go “Divi> Divi Library” and click “Import & Export” then import these layouts.
We must import “Footer.

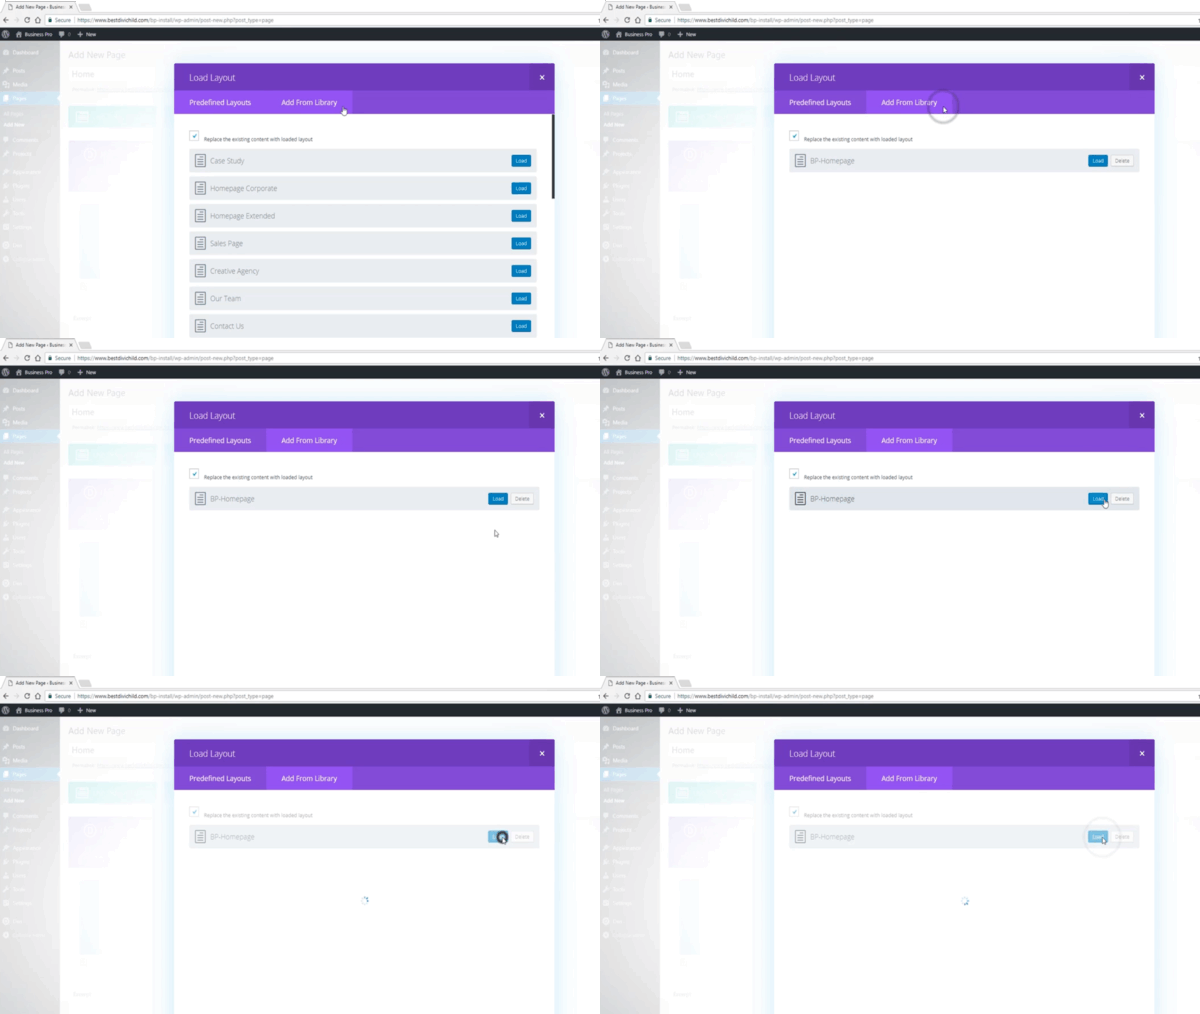
Create Page: After that, create new page use the Divi builder, then click
“Load From Library” > “Add From Library”
and click the “Load” buttons which you would like to use.

Import Dummy Posts/ Projects: If we would like to import some dummy posts & projects contents which were used at the demo, we can do that with default WordPress importer. Within the “Import” folder there is an XML file called “
Create Menu: Finally, create the navigation menu visiting
“Appearance > Menus”
Primary Color: With this
Finally, it’s done, cheers! Review the site.
At any point, if you would like to contact us, please use the support page. We will get in touch with you as soon as possible.
